Monday, December 19, 2011

January Stamping Technique Class

Monday, January 9, 2012 at 6:30 p.m.

Memorial Medical Center

Manz Conference Room

Neillsville, WI


I invite you to join us for our monthly Technique Stamp Class. We had so much fun in December and learned a new technique - Stamping with Shaving Cream.


The January Class will make you think of your sweetheart!!


Kissing with a Twist!!

(Not to worry you won't be kissing anyone, the stamps will be!)


We will make two cards using the Kissing Technique, they will be two cards that can be used as a Valentine card or as a Birthday Card. I will also be featuring a new stamp set and ribbon from the Occassions Mini Catalog that will be coming out in January.  Our third card will be a Fancy Fold.


If you would like to joy us email me an RSVP.

The class is only $10, or FREE with a $15 Stampin' Up! Order

I need to have an idea how many will attend so that I have enough supplies. Or if you like or have questions, feel free to call me at 715/743-2326.  If you are interested in the cards, but do not live in the area, the 3 cards are available in a kit with all the cardstock cut out, stamped, including supplies.  All you have to do is put them together.


So don't delay, mark your calendar and I hope you can join us!!

Cindy Ehlers

"Have you stamped today?!"


A Friend is someone who reaches for your hand but touches your heart!


Time waits for no one. Treasure every moment you have.

Thursday, December 15, 2011

Stamping Class Technique - Shaving Cream Card #2


Here is the second card that we made for our Stamping Technique Class that we had on Monday. This card can be used as a Christmas Card, Thank You or a New Year's card, just by changing the sentiment. The reinkers that I used for the shaving cream background was Bashful Blue, Pacific Point and Marina Mist.

Here are the ingredients:

Card Base - Marina Mist with a Bashful Blue layer that was run through the Big Shot using the Snow Flurries Embossing Folder, Marina Mist again was used as a list under our Shaving Cream piece.
Stamp Set - Petite Pairs
Accessories - Snowflake die, each snowflake was cut out twice in Whisper White and in Silver, a jewel was added to the center of each snowflake for that needed bling that we all love!!

Thanks for stopping by, hope that you enjoyed the card!!
Cindy
Posted by Picasa

Wednesday, December 14, 2011

Shaving Cream Technique

I have had a request for the instructions on just how you do this technique, its really quite easy and you are going to love the results.  So here it is:

Shaving Cream Technique

Supplies:

* Shaving Cream

* 2 - 3 Dye Ink Pad Re-Inkers

* Wooden Stick (Skewer) or Plastic Knife

* Pie Tin or Paper Plate

* Cardstock

* Paper Towels

* Rubber Gloves

* Scrapper (Pampered Chef)


1. Fill your container with shaving cream.

2. Use a Plastic Knife to smooth it out a bit.

3. Add several drops of each of your re-inker colors to your shaving cream.

4. Mix shaving cream and re-inker in a swirling motion.

5. Press your cardstock into the shaving cream. Make sure the card front is completely covered.

6. Pull Cardstock out of the shaving cream.

7. Lay on a piece of paper towel.

8. Scrap off any access shaving cream with a scraper onto another piece of paper towel.

9. Take a piece of paper towel and wipe away any remaining shaving cream in a swirling motion.

10. Let dry, this will only take a minute.
 
And there it is.  If you have any other questions, feel free to get in touch!
 
Thanks for stopping
Cindy

Stampin Class Technique Cards - Shaving Cream Card #1

This was the first card that we made at our Monday night Stamping Technique Class. The technique was stamping with Shaving Cream! The ladies were quite surprized when I dipped my piece of Whisper White cardstock into the pie pan that I had put shaving cream in and drops of Garden Green and Real Red Stampin' Up re-inkers, then when I scrapped off the shaving cream to leave a beautiful background for our card, I think they were simply amazed!!

Here are the ingredients: (Stampin' Up!)
Stamp Sets - Bright Hopes from the Holiday Mini Catolog
Ink - Garden Green & Real Red
Cardstock - Real Red Base 3 3/4 x 3 1/4
Garden Green layer Embossed in the Big Shot using Vintage Wall Paper Embossing Folder
Whisper White 3 1/4 x 3 1/4 for our Shaving Cream Background
Whisper White 3 x 3 for our wreath
Accessories - 3" Sizix Circle Die, 4 Silver Mini Brads, 2 Dimensions & Sponge Daubers

Hope you have a Blessed and Merry Christmas and Happy New Year
Cindy
Posted by Picasa

Sunday, December 11, 2011

Santa Stocking Stuffers


While I watched the Green Bay Packers play this afternoon and win over the Oakland Raiders, I made these cute stocking stuffers. It's a great way to use up your scraps as its all punch art.

* Stampin' Up! Extra Large Oval Punch - 1 in Real Red & 1 in Whisper White
* Stampin' Up! Large Oval - 1 in Pretty in Pink
* Stampin' Up! Ornament Punch - 1 in Whisper White then run through the Big Shot with the Elegant Lines Embossing Folder
* Stampin' Up! 1/4" Circle Punch - Silver
* Stampin' Up! Itty Bitty Circle Punch - 2 Black, 1 Blushing Bride, 1 Real Red
* Stampin' Up! Cello Bags
* 2 Sticks of Strawberry Twists

They turned out so cute and I can't wait to put one in the stockings on the mantle for the son.
Posted by Picasa

Saturday, December 10, 2011

Christmas Gift Card

This one of the cards that we will be making at my Stamping Class this coming Monday night. Its so simple to make you can make one if you have a favorite someone that you plan to give a gift card to. Here are some of the details:

Stampin' Up! Cardstock: Crumb Cake, Cherry Cobbler, Early Espresso, Holly Berry Designer Paper
Stampin' Up! Ink: Cherry Coffler, Crumb Cake
Stampin' Up! Stampset - Delightful Decorations, Snowflake Wheel (retired)

Details, the base of the card is in Crumb Cake, is 5 1/2 x 4 1/4; Scorred at 2 1/2 & 4 1/2. The Belly Band is 1 inch wide, 7 inches long and is loosely wrapped around the card and securred. Take a standard card envelope, seal it, then fold in half; cut at 2 1/2". Do not cut the folded edge. The envelope is put inside the card and secured and will hold your gift card and a note.

Super Simple, and Super Pretty!

I will show the other two cards in the days to come, the December Technique was Stamping with Shaving Cream! I can't wait to show you!

Take care, and as always, Thanks for Stopping!
Cindy
Posted by Picasa

Wednesday, November 23, 2011

It's That Time of Year Again!!

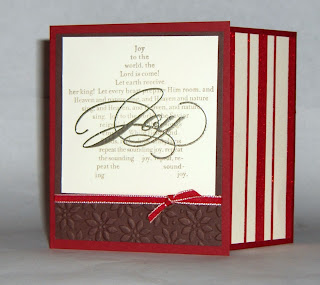
That time of year when I am busy in the evenings making my Christmas cards, AND I am happy to announce that I am finished making my cards!!  I usually make about 40 or more cards, not just for family and friends but also for some of my co-workers. I still have some other items to make and I will for sure share them with you when I get them done.  But here is the card that made:
This card is called a Joy Fold card, it opens from side to side and the greeting is in the middle. I just love these colors together, Chocolate Chip and Cherry Cobbler.  The stamp set is from Stampin' Up! and is in the Holiday Mini Catolog and is called The Sounding Joy.  The embossing at the bottom of the card is the Embossing Folder Petals A Plenty run part way through my Big Shot.

This fold is also the fold that I taught at the Stamping Technique Class that we just had here in Neillsville, only it opened the opposite direction. I just turned the card upside down (on purpose) and had it open the other way. Neat idea huh?!!

Now that I have my Christmas cards done, its time to start on my December Technique Class cards, we are featuring the stamping technique, stamping with shaving cream!!  Oh honey, do you mind if I borrow.......

Take care, Happy Thanksgiving to everone!
Cindy

Sunday, October 30, 2011

Happy Halloween!!

"Happy Halloween"
I came up with this cute Halloween card for my little granddaughter Andi's first Halloween. She's too little to be treat or treating but this card will go into her scrapbook for the future.

The Stampin' Up! stamp set that I used is Jack-o-Lantern, Cardstock is Crumb Cake, Chocolate Chip, and Whisper White.  The ink is Pumpkin Pie and Basic Black. I used the bat punch to punch out some bats and a glitter brad to complete the card. For one of the layers, I used some retired Designer Series paper.

I can't leave you without sharing a picture of Andi, which I took on Friday when she came to visit me. She is really growing and enjoyed playing in the walker that I have.  She had the cutest little pumpkin t-shirt on and lime green M&M socks, she was just adorable!


I hope you all have a "Happy Halloween" and enjoy the moment. As always, thanks for stopping.

Cindy


Tuesday, October 25, 2011

Seasons Greetings and Snow Swirled

You would never believe that I spent almost all night designing this card, but the end results are just great!  Again I used the Emboss Resist Technique.  I embossed the tree in silver and then used Stampin' Up! Bashful Blue ink to sponge the color onto the cardstock.  I only ran half the cardstock through my Big Shot with the Snow Burst Embossing Folder to give it alittle different texture.

The weather is calling for light snow on either Wednesday night or Thursday morning; alot of people are upset by this but I look on the bright side, in six months it will be spring again and we'll all be so happy to see the grass turn green (so that we can mow it) and the flowers will be coming up. 

As always, thanks for stopping and take care.
Cindy

Thursday, October 20, 2011

Christmas Gratitude

Ta-Dah!!  Here is the first Chritmas card that I have made for the season, well actually its the third card as the first two weren't quite what I wanted. I guess the third time was the charm!  I am teaching a Technique Class in Neillsville and will be featuring this card along with 2 other cards for our first class in November. It uses the technique Emboss Resist. 

I used the following Stampin' Up! materials:
Day of Gratitude & Season of Joy stamp sets, Cherry Cobbler, Basic Grey & Very Vanilla Cardstock, Cherry Cobbler & Pear Pizzazz Ink.

The days are getting shorter and after all of the wind that we have had in the last week, most of the trees have lost their leaves. I love fall but am sad as I know that winter is just around the corner.  Probably the one that think that I really don't like is the shorter and shorter days. Seems that I get up in the dark to go to work and there is only about an hour of daylight by the time I get home.  But that is the way it is and I spend more time on my stamping now.

Thanks for stopping in, let me know what you think I would love to hear from you.
Cindy

Monday, October 10, 2011

Who wouldn't LOVE a Free Stamp Set!!

That what I say, this is a great offer by Stampin' Up!  If you are intrerested, email me, lets talk!!

Monday, October 3, 2011

Wedding Card

So I am a nice mom and made another wedding card so that Justin would have a card to give the bride and groom.  I am not sure if he really likes my cards, although he always says he does or if its easier to grab a card that mom made rather than go shopping for one on his own!
So here is the card, you may have seen the bride and groom hearts in a black and white, well the couple are having a fall wedding and the guys will be wearing dark brown tux's, so I thought that this would work. After I punched out the white heart for the bride, I ran it through my Big Shot using a Big Shot embossing folder. 

The colors that I used are from Stampin' Up! Chocolate chip, Very Vanilla, Always Artichoke and Whisper White.


As always, thanks for stopping.
Cindy

Tuesday, September 27, 2011

Mr. & Mrs.

We are invited to a wedding in October and I am excited to share the card that I made for them.  It really turned out nice and I am so glad that it did. The groom of the young couple getting married is probably my son's best friend, and Justin is also standing up in the wedding; just like Tony stood up in Justin's wedding last year.  I am always amazed at these two, they have known each other since grade school, have spent so much time together but yet have always respected each other and probably didn't even realize it.  They are so funny together and are like two peas in a pod!!

Maybe you have noticed but I also have made cards using the matching stampset to this embossing folder, its called Fabulous Florets and are meant to be used together. But I decided to mix it up just a bit and not use the stampset, just the embossing folder.
All Ingredients are Stampin' Up!
Cardstock:  Calypso Coral, Daffodil Delight, Vellum Cardstock
Stampset:  Tiny Tags
Ink:  Daffodil Delight, Soft Suede, Calypso Coral
Accessories:  Framed Tulips Embossing Folder, Flower Garden Embossing Folder, Scallop Oval Punch, Small and Medium Oval Punch, 2 white brads

Here is a close up of the Embossing Folder that I used.  It is definitely one of my favorites!!

As always, take care and thanks for stopping in!
Cindy


Sunday, September 25, 2011

Its a Circus!!

I think we all have days that are just a circus sometimes!!  I know I sure have and its usually happens on the weekends when you have so much you want to get done, get sidetracked and realize much later that you got nothing that you wanted to do done!!

I haven't done any punch art lately and figured why not, I don't have many "childrens" stamps but I should probably get some more since I have a lovely little granddaughter now!!
All Ingredients are Stampin' Up!
Cardstock:  Early Expresso, Crumb Cake, Daffodil Delight, Basic Black, Poppy Parade, Whisper White, Garden Green

Ink:  Bashful Blue, Peach Parfait, Cajun Craze, Soft Suede
Accessories:  2 Jewels, Sponging
Punches:  Postage Stamp, Scallop Circle, 1 3/8 & 1 1/4 Circle, Lace Ribbon and Modern Label

Here is a photo of the stamp set, it has alot of cute animals on it; which is why this card ended up being so much fun to make!!

As always, take care.
Cindy

Wednesday, September 21, 2011

Fabulous Flower!

The card that I want to share today highlights the new Stampin' Up! Lace Ribbon Border Punch.  I love it and am finding it adds just the right amount of pizazz to my cards.  It has more uses than I had originally thought and I will be making more cards to share with you.

This card uses the Lace Ribbon punched in white then punched again in Pacific Point Cardstock and the flowers are punched out of the lace with the 3/4" Circle Punch. Tape the flowers over the white lace and add a rhinestone jewel to the middle of each flower.

See what I mean, the flower was good before but its great now!!

As always, thanks for stopping.
Cindy

Monday, September 19, 2011

Hello Friend!

Happy Monday!!  Its back to work I go but I had a chance to make this card on Sunday.  Between watching the Packer Game, doing laundry, folding laundry and making a nice pork roast for me and the hubby for supper, I actually got some stamping done!  I guess if I didn't love to stamp so much, I wouldn't get so much done!  Seriously, the more I stamp, the more I want to get my other chores done so that I have more time to....you guessed it, stamp!!
This card is really pretty neat, I stamped the flowers onto the background of my River Rock cardstock, then ran it through my Big Shot using the Dot Emobossing Folder.  It really made a very neat background; added the tag and I had just made a simple but attractive card that I can use for someone as a Get Well, Thinking of you or even Happy Birthday.  I love it!!  What do you think?

The cardstock that I used was Always Artichoke, Chocolate Chip and River Rock.  The ink was Cherry Cobbler and Always Artichoke.  The stamp set is Fabulous Florets and all of the above is using Stampin' Up! ingredients.


As always, thanks for stopping in!
Cindy

Sunday, September 18, 2011

Happy Birthday Honey!

Here is the great Birthday card that I made my husband this week. Being that he is a long time hunter, this retired stamp set from Stampin' Up! called Noble Deer.  This was the perfect stamp set to use for my husband's birthday card.  I also wanted to try a new fold and I was pleasantly surprized at how well it turned out.  I am not always a good one to try something that "isn't" in my comfort zone but I am glad that I tried this fold.  The best way to describe it is a card within a card. You use 2 pieces of cardstock to fold into each other.
Here is another shot of the card from another angle to give you a better idea what I am talking about.

Right now, I am really trying to get a Technique Club going in our area. If you happen to subscribe to my blog and if this is something that you are interested in, let me know. It will meet monthly and it will be so much fun!! Its still in the planning stages and we are hoping to get together informally in October.


As always, thanks for stopping!
Cindy

Monday, September 12, 2011

Its September Already!!

All I can say is Wow!!  Where did the summer go?  On the bright side its almost fall and I cannot wait!!  Fall is my favorite time of year and I just love being outdoors, its cooler, fewer bugs and the mornings are crisp!  Its also almost time for soup or chili!! 

Have you had a chance to check out the new Stampin' Up! Holiday Mini Catolog yet?  Well if you haven't, what are you waiting for?!!  Its just great and I know you will just love it. 

http://204.228.150.61/catalogs/2011holidaymini/20110901_Holidaymini_en-US.pdf

Just click on the link above and you can see what you are missing.  I know that you won't be disappointed. Email me if you see something that you know that you can't live without, budy98@yahoo.com

Thanks for visiting me today, I have a couple of cards that I really need to start working on.  Have a great day!!

Cindy


Monday, August 15, 2011

Great Idea!!

Hi Everyone!!

Can you believe that its already the middle of August already?!! The summer just seemed to speed by, but then it always does! I have been doing some stamping this summer, with a husband who works nights, it helps pass the time.

I wanted to throw this idea out there at you, so let me know if this is something that you might be interested in, feel free to pass this on to anyone who might want to get into stamping. I know how hard it is to find the time to have a workshop so that you can get some new stamping items, but I have this great idea. Why not have a catalog workshop?!

A catalog workshop is quite simple, I supply you with a catalog to use, you take the catalog with you to work, to your friends and family and let them brose through it. Then collect orders that total $150, it really isn’t that hard to do and can be done with as little as three people placing a $50 order each.

To make it even more fun, I have made up cards that I have stamped, they come with their very own envelope. Since you are having a catalog workshop, I wanted your customers to have alittle fun. With an order of at least $30, they can have one of the cards, inside the card is a coupon for any number of fun things. Like FREE shipping, or a FREE SU Classic stamp pad, or a FREE container of SU buttons or brads to list a few. They get to keep the card and enjoy a nice surprise!!

Because you are still the hostess, once you have your $150 or more order, you will receive not only the Stampin’ UP! Hostess benefits but I will also be giving you the Hostess gift that I give all my hostesses to show my appreciation. Remember with a workshop of at least $150 in sales, you will enjoy $25 in hostess dollars to spend on specially priced hostess products at the beginning of the catalog or any other catalog item that you have your heart set on. AND the catalog is yours to keep!!

Thanks for your time and look at it this way, you don’t even have to clean your house to have one of these workshops!! (Unless you want to!)


Cindy Ehlers

Email: budy98@yahoo.com


Wednesday, August 10, 2011

Beautiful Wedding Card

I had a request for some wedding cards, and after checking my own supply found that I also needed some new wedding cards. So this is the card that I came up with.  The ingredients are as follows:

Cardstock: Whisper White 5 1/2 x 4 1/4 & 2 1/2 x 4 3/4
Calypso Coral 5 x 4 3/4, Basic Grey 5 1/4 x 4

Ink: Calypso Coral, Black
Stamp: Tiny Tags
Accessories: Flower Garden Embossing Folder, Pearl Jewels, Sponging, Black Grosgrain Ribbon

Thanks much for stopping by!!
Cindy

Sunday, July 17, 2011

Happy Birthday Daddy!

It's my dad's birthday today and here is the card that I came up with!  He always liked to hunt and did go moose hunting a couple of times. I was surprized how fast that this card came together.  I think I will be doing quite abit of stamping this week as we are now included in the hot and humid weather. I don't mind the heat its the humidity that takes alot out of me.

Saturday, July 16, 2011

July Color Challenge

My upline, Kelly, always has a color challenge for her downlines to participate in. It helps get the creative juices flowing. This month's challenge was to use the colors Baha Breeze, Crumb Cake, Basic Grey and Poppy Parade.  It wasn't too hard of a challenge, just finding the right layout took some time.

Hope you like my card, as always thanks for stopping in!!
Cindy

Wednesday, June 29, 2011

Beautiful Blossom

I made this card the other night and could not resist sharing it, the colors are so rich, I just love how it turned out.  The stamp set is Build a Blossom and matches the new Blossom Punch. You have to punch out each petal of the flower and then the leaves and assemble.  But after I got done I just was amazed how pretty this flower is!!  I used two of the new in-colors for 2011-2012, Island Indigo and Lucky Limeade.

As always thanks for stopping in, happy stamping!!
Cindy


Thursday, June 23, 2011

Oh Baby!!

Could you hear us "Shouting for Joy" on June 11, 2011 at about 10 p.m.??!!  We Jim and I are now official member sof the Grandparents Club!  Whoo-hoo!!! 

Little Andi Elizabeth Ehlers was born to Justin and Kristy Ehlers on Saturday, June 11, 2011 at 9:53 p.m., she weighed in at 7 pounds, 4 ounces and was 19" long.

Would you like to see a picture?!  Well of course you would!  Here she is:


She is as cute as she can be and I couldn't help but get Justin's babybook out and compare and yep, she looks like her dad with all that lovely dark hair and those chubby cheeks!

Here is the baby announcement that I designed for the happy event!

Thanks for stopping in and sharing in our joy, hope you like the card.

As always, take care,
Cindy

Wednesday, June 22, 2011

Last Chance to Order Retiring Accessories and Stamps!!

Hi All, With June quickly coming to a close (where did the month go?!) now is your last chance to get the Stampin' Up! Accessories and Stamps that you had on your wish list but didn't get a chance to order. I will be putting an order in before the end of the month so email me your order and I will be happy to help you get the Stampin' Up! things that you really want.


Here is the link for the Retiring Accessories: http://www.stampinup.com/ECWeb/ItemList.aspx?categoryID=799


Here is the link for the Retiring Stamps: http://www.stampinup.com/ECWeb/ItemList.aspx?categoryID=738


And here is the link for the Retiring Decor: http://www.stampinup.com/ECWeb/ItemList.aspx?categoryID=754


Remember June 30, 2011 is the last day that you can order these retiring accessories, stamps and decor. If you are interested in getting a copy of the 2011-2012 Stampin' Up! catolog I have my order in and they will be here next week. I am selling them for just $5 a piece, you don't even have to have a workshop to get one. If you are interested in hosting a workshop or a catolog party (with a catolog party you take the catolog and share with your stamping friends and collect the orders, with the same benefits as a workshop), I can get you a new catolog for FREE.


Thanks for your time and thanks for thinking of me for your Stampin' UP! needs. Happy Stamping!!

Cindy

Tuesday, May 31, 2011

Summer Mini Catolog is Here!

The new Stampin' Up! Summer Mini catolog is in full swing and I just wanted to share with you a couple of cards that I made using the new Triple Layer Punch.  The one I just got is called the Doily Triple Layer Punch and sells for $23.95 in the new Stampin' Up Summer Mini Catolog on page 6. 

Now if you thought that the new punch is just another flower punch, well think again!  Here is another idea of what you can use this new punch for. 

With summer just around the corner, don't these watermellons look mouth watering?!  Its the same punch, only different colors and we now have watermelon slices instead of flower. 

Here is what the new punch looks like:

Yes, it is one punch that will punch 3 different coordinated punch images with just one punch.


Have a great day, as always, thanks for stopping.
Cindy


Monday, May 16, 2011

I Couldn't Resist Another Birthday Card!

I couldn't resist another birthday card, but then its always so nice to have a good supply of birthday cards on hand; AND I have another new punch to play with. Its the Postage Punch and its brand new in the SU Summer Mini catolog.

My card is a simple design, one that is easy to reproduce and the different layers add such a nice touch, don't you think?!

All ingredients are Stampin' Up!
Stamp Set - Punch Bunch (Sale a Bration)
Ink - Poppy Parade
Cardstock - Poppy Parade, Whisper White, Daffodil Delight, Beyhond the Garden DS Paper
Accessories Dotted Embossing Folder, Silver Brads

As always thanks for stopping in,
Cindy

Saturday, May 14, 2011

A Fabulous Card!!

Happy Saturday, and for us another wet weekend and cool!  Who would ever think it would be so cool for us the middle of May.  I made a couple of cards that I want to share with you this week.  The first card was such a simple card that can be used for so many occasions!

All of the supplies are from Stampin' Up!
Stamp Set - Fabulous Florets from the SU Summer Mini Catolog
Ink:  Marina Mist, Peach Parfait, Pear Pizazz
Cardstock: Marina Mist, Peach Parfait, Daffodil Delight, In the Garden DS Paper
Accessories:  Flower Garden Embossing Folder, Boho Blossom Punch, Pearl Jewel, Dotted Scallop Ribbon Border Punch and Scallop Trim Punch

My punches really got a work out for this card and I did a bit masking with the stamped flower image. Let me know what you think of the card, and don't forget all of my cards are for sale, just email me and I will fill you in on the details.

As always, thanks for stopping in!
Cindy

Tuesday, May 3, 2011

Just One More Birthday Card!

Yes I know, I didn't think I was going to make another birthday card either!!  But I just got this Stampin' Up! Hostess stamp set and I couldn't resist.

Ingredients:
Stamp Sets: Birthday Bakery, Afterthoughts
Ink: Early Expresso
Paper: Sahara Sand, Old Olive, Whisper White, Melon Mambo
Accessories: White Grossgrain Ribbon

This is definitely one of those easy-peasy cards!!  But its still cute in my book!!  Hoping to find time to make soem more cards tomorrow, hopefully they will make it to the blog also!!  At any rate, take care and as always, Thanks for Stopping!

Cindy

Sunday, May 1, 2011

Another Birthday Card

I guess you can never have too many birthday cards, and here is another one that I made today. After cleaning the house and doing some laundry, it was time to take some time for myself and make a couple of cards.  This one uses two different stamp sets from Stampin' Up! 


Ingredients:
Stamp Sets - Create a Cupcake, Four Frames
Ink: Pretty in Pink, Bashful Blue, Chocolate Chip, Daffodil Delight
Paper: Sahara Sand, Old Olive, Regal Rose

Thanks much for stopping by, I have another card to show you so stay tuned!!

Cindy

Thursday, April 28, 2011

My Twisted Easel Card

This card really took me out of my comfort zone, a Twisted Easel Card and Emboss Resist Technique.
Here are my ingredients, all Stampin Up!

Cardstock: Daffodil Delight, 4 1/4 x 11, Old Olive, 5 1/4 x 4, 3 1/2 x 3 1/4, Night of Navy 3 3/4 x 3 1/2,
Whisper White 4 x 3 3/4, Glossy 3 1/8 x 3 1/4

Stamp Sets: Fresh Cuts & Four Frames
Ink: Night of Navy, Daffodil Delight & Old Olive
Accessories: Elegant Lines Embossing Folder, Black Embossing/Embossing Budy, 2-Dimensions, Blossom Party Die & Floral Fusion Die. The center of the flower is punched from Old Olive Cardstock.

Thanks much!
Cindy

Tuesday, April 26, 2011

Four Frames

I was doing alittle experimenting, I like the Emboss Resist
Technique and having just got my new Stampin' Up! Color Coach it was fun to try some different color combinations.  This combination uses Stampin' Up! Rich Razzelberry, Old Olive and Pumpkin Pie colors.

The cardstock base is Rich Razzelberry, a layer of Old Olive that I ran threw my Big Shot using the SU Tulip Frames Embossing Folder, then the Glossy Cardstock that I stamped using the stamp set Always and Four Frames using Versamark and embossed that with black embossing powder. After letting it dry, I sponged on the color and finished the card! 

This is a fun technique, alittle time consuming but the finished product is so pretty in real life!  This will make a great anniversary or wedding card depending on the occasion.

As always, thanks for visiting.
Cindy

Thursday, April 21, 2011

Punch Bunch Birthday

Here is a card that I made awhile ago and realized that I forgot to share. Doesn't it look like a fun summer card for anyone's big day?!

All ingredients are Stampin' UP! 
Stamp Sets:  Punch Bunch from the Sale-a-Bration Catolog
Ink: Tangerine Tango, Pacific Point & Daffadil Delight
Paper:  Peach Parfait, Pacific Point, Ice Cream Parlor DS Paper

And to make it special I used Dimensions, White Grossgrain Ribbon, the Square Scallop Punch and the Scallop Punch.

Thats it, I hope you enjoyed my card, as always, thanks for stopping in!

Cindy

Sunday, April 3, 2011

Baby Shower Invites

Here is the baby shower invites that I am making
for Justin & Kristy's baby shower. The guys are also invited to a special diaper party at the same time that the gals are invited for the baby shower. Both Justin & Kristy are outdoor'sy so that why I decided on this cute little forest friend.

All ingredients are from Stampin' Up!
Stamp Set:  Forest Friends, Tiny Tags

Cardstock:  Whisper White 5 1/2 x 4 1/4, 2 x 4 & 2 x 2
Chocolate Chip 1/4 x 4, 2 1/2 x 2 1/2
Certainly Celery 2 1/4 x 2 1/4 & 1/8 Punch Circles for Flowers
Pretty in Pink for Tiny Tags using Tag Punch, Flowers using Boho Blossoms

Ink:  Chocolate Chip

Accessories:
Glue dots, Gold cord

I only had to make 36 of them and they went really fast, almost have them done but I had to take a break so that I could share!  As always, thanks for stopping in and take care.
Cindy

Wednesday, March 30, 2011

Springtime Eastern Blooms

I have been missing in action for awhile, March has been the busiest month that I have had in a very long time. I was able to visit my parents in Naples, Florida the first part of the month. The weather was great compared to Wisconsin. Two stamping workshops and now I am helping my husband with his latest brainstorm! He decided to tap maple trees this spring. We only have 30 trees taped but 2 taps per tree equals 60 taps and 60 buckets! It also equals alot of work but it hasn't been too bad, our son has helped gather and being outside on a nice day has been great!

My card uses all Stampin' Up! products.
Stamp Sets - Eastern Blooms & Priceless Cardstock - Rose Red, Pretty in Pink, Very Vanilla and DS Paper Springtime Vintage
Accessories: Scallop Trim Punch, Grossgrain Ribbon that I dyed Rose Red, Pearl Jewels and Dimension for the one flower.

So tell me, what do you think? After I got done with the card I thought, not bad for someone who worked outside all day, took care of the beagles tonight and is very tired!!

As always, thanks for stopping by. My SU order will be here tomorrow and I can't wait; can you say cardstock?? My supplies are seriously depleted and I can't wait to see my goodies, just like Christmas in March!!

Wednesday, February 23, 2011

Spring Has to be Near!!

After getting another 14 inches of snow this past weekend, I don't know if we will ever see spring. I think it was so close all last week with temps in the 40's and 50's, but no winter is back. Heard on the weather forcast that another snow storm may be headed this way, could stay south and hit Chicago and Milwaukee; or go north and get us.

Oh well, I just will be content and dream and make some spring cards. This card uses Stampin' Up! Punch Bunch stampset, the cardstock is Rich Razzelberry, Wild Wabassi and Spring Vintage Designer Series Paper. I added some pearl jewels around the Razzelberry scallop, added a ribbon and the card is complete.

The best part this card can be used for either a Get Well card or Birthday Card or even a Thinking of You card.  How cool is that?!

I am busy working on some photo cards for my mom so that I can take them with me when I go to Florida on vacation in exactly 14 days!

As always, take care and thanks for stopping.
Cindy

Sunday, February 13, 2011

Happy Valentines!

Happy Valentines Everyone!
I had to share one of the Valentines that I made this year. This one is the one that I gave to my hubby.  Such a simple card but it turned out so nice.  Using all Stampin' Up! materials, and SU's newest rub-on's made this a quick and simple card. I punched 2 hearts in Real Red cardstock and then added the rub-on and a crystal jewel to complete the look.  Added some red grossgrain ribbon and wha-la, card is finished.

We are having the absolute best weather right now; after putting up with cold and more cold, today was a beautiful day with temps up to 50. Yes 50, first time we have seen 50 since probably November of last year. It really made the snow melt, which we have alot to melt.  Justin and Kristy came over and brought their snowshoes. So Kristy and myself went snowshoeing, we went for a hike through the woods up to my folks which is about a mile. It was so pretty in the woods and after a rest we hiked or rather snowshoed back to our place. Raz (their lab mix) came along and even she was pretty tired by the time we got back. I am sure that I will feel it tomorrow but other than working up quite a sweat, it went pretty well. It was so nice to spend the afternoon outside.

I am getting ready for two stamping workshops so that has been taking alot of my time. Will share the cards that we will be making after the workshops. I have to make the hostess gifts and start cutting cardstock so that I am all prepared.

As always, thanks for stopping in!
Cindy