March Technique
Shadowing
Better late than never I always say! After having some computer issues, I am happy to say, I think we are all good! You know what they say, to error is human to really screw things up takes a computer!
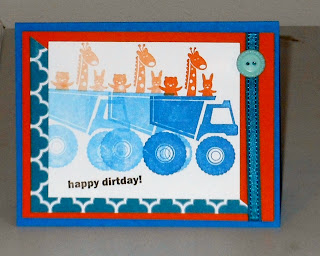
March Class featured the technique, Shadowing. Stamp your image in colored ink and then on the cardstock. Without re-inking, stamp directly over the image again. Because you will seldom be exact, you will leave a shadow behind your first image. This image is also called the Motion Technique. Now here are the cards that we made.
Stamp Set: Need for Speed
Ink: Soft Suede, Always Artichoke
Cardstock: Cajun Craze 5 1/2 x 8 1/2, scored at 4 1/4; Very Vanilla 2 1/4 x 5 1/2, DS Sycamore Street 2 x 5 1/2 and Always Artichoke 2 x 5 1/2
Accessories: Vine Street Embossing Folder, Dimensions, 2 black brads, Itty Bity Banners Die, Adorning Accents Die & Folder
HINT: Use a sticky note to keep your die in place whole running it through the Big Shot, keeps it still and it doesn't hurt a thing!
Happy Birthday Card - Little Boy
Stamp Set: I Dig you
Ink: Early Espresso, Pacific Point, Pumpkin Pie
Cardstock: Pacific Point 5 1/2 x 8 1/2 Scored at 4 1/4, Pumpkin Pie 5 1/4 x 4, Whisper White 4 1/4
Accessories: Sycamore Street Button, Ribbon & DS paper 3 3/4 x 4 3/4
Card 3 - Get Will w/a Tissue!
Stamp Sets: Oh Whale!
Ink: Island Indigo, Pool Party
Cardstock: So Saffron 5 1/2 x 8 1/2 (Scored at 4 1/4), Island Indigo 2 1/2 x 3 1/4, Pool Party 5 x 4/14, Whisper White 3/4 x 2 1/4, DS Sycamore Street 3 3 1/4
Accessories: Cloudy Day Embossing Folder, Dimensions, Tissue.
Tissue Box: Make the box from patterned paper measuring 3 x 3 3/4, Score 2 lines on each edge at 1/4" and 1/2" on all 4 sides. Before you actually form it into a box, punch out a large oval from the center. Cut off the corners up to the deepest score line and form it into a box. Use glue dots or multi purpose liquid glue to attach yo9u box to the card. I found tucking the tissue into the box after it was made was easier than trying to glue around the tissue.
HINTS: Glue one side of your little box then work your way around, use your scissors to hold down the tabs so that it sticks well. When punching oval, insert paper as far as it goes and then punch in the center,. Tuck the tissue into the oval opening.
Thanks so much for stopping in, next month's technique is Stained Glass.
As always, take care,
Cindy


