Friday, June 2, 2017

May Stamp of the Month - Bella & Friends

The Stamp of the Month for May was Bella & Friends; the cute pups have made this stamp set one of my favorites!!  I am also so happy that this stamp set will be in the new Stampin' Up! 2017-2018 Annual Catalog.

 This cute stamp set is located on Page 49 of the new Stampin' Up! Annual Catalog.

Here are the cards that I designed to go with the Stamp Set, Bella & Friends.  Remember, this card and stamp set is still available, contact me if you are interested.  If you already have the stamp set, you can purchase just the card packets at a great savings!! With either package above, you get everything you need to create these beautiful cards, I have cut out and scored the card bases; the kit comes to you with complete instructions and color pictures.

Card #1 - Celebrate You
 Stamp Set:  Bella & Friends
Ink:  Memento Black
Watercolor Pencils:  Melon Mambo, Real Red, Pacific Point, Early Espresso, Daffodil Delite
Paper:  Delightful Dijon Base, Pacific Point Designer Series Paper, Marina Mist Layer, Whisper White
Accessories:  Dimensions, Balloon Punch, Linen Thread

Card #2 - You've Got A Friend
 Stamp Set:  Bella & Friends
Ink:  Memento Black
Watercolor Pencils: Early Espresso, Old Olive, Basic Grey
Paper:  Pool Party Base, Island Indigo Layer, Blooms & Bliss Designer Series Paper
Accessories:  Dapper Denim Enamel Dots, Dimensions

Card #3 - Thank You Friend
 Stamp Set:  Bella & Friends
Ink:  Memento Black, Cajun Craze
Watercolor Pencils:  Black, Gray, Early Espresso
Paper:  Cajun Craze Base, Whisper White Layer
Accessories:  Masking Technique, White Perfect Accents

Card #4 - I'll Be Your Up
Stamp Sets:  Bella & Friends, Sprinkles of Life (Clouds)
Ink:  Soft Sky, Memento Black
Watercolor Pencils:  Pumpkin Pie, Bermuda Bay, Early Espresso
Paper:  Soft Sky Base, Frozen Treats Designer Series Paper Layer, Whisper White

What do you think, aren't they cute?!!  I love doing the Stamp of the Month cards and hope that you will join me in June for the Stamp of the Month, details are coming soon!

*******************************************************************************
Here is What is Happening:

SIGN UP TODAY!!


  June 12 - Technique Class, Apple Valley, Neillsville
  June 14 - Technique Class, Apple Valley, Neillsville
 June 27 - Kit Class, Schmittys, Neillsville

 
PRIVATE CLASSES ARE AVAILABLE - CONTACT ME TODAY!


  Cindys Stamping Studio On Line Store
(Just click on the above link to enjoy your Stampin" Up! Shopping!!  Thanks!!


******************************
  • Check out the Clearance Rack, just click on the link on the right hand side.
  • Check out the Paper Pumpkin monthly project kit - subscribe today - Paper Pumpkin Link

Thursday, June 1, 2017

June Technique Class - Thinlet Stamping

Have you ever looked at your thinlets and wished that there was a stamp for that?!  Well wish no more and make plans to join us at my June Technique Class.  I will teach you how you can use those thinlets for stamping.  Now I realize that traveling all the way to Neillsville is not always an option, I am now happy to report that I am offering my Technique Classes in the form of a kit.  You will receive the three card projects with detailed instructions with color pictures!!  The cost is only $15, which includes postage and handling!

Because the new Stampin' Up! Catalog launched today, we you can be sure that we will be using all new Stamp Sets, Ink, Paper and Embellishments!


June 2017 Technique Class

Thinlet Die Stamping Technique
 Join me in June and I will show you this cute technique, and yes that is correct we will be stamping using Thinlets that we make into stamps!! You will be able to make two Technique Cards and a Fancy Fold Card.  We will be making 3 beautiful cards for you to share.
 
                            Join me for a fun two hours of stamping!!
 
Monday, June 12 at 6:00 p.m.  
Apple Valley Bar &Grill
Or
Wednesday, June 14 at 6:00 
Apple Valley Bar & Grill
Located in Neillsville, W. Division St.


To help you plan your evening, class usually takes about 2 hours, so you can figure to be done by 8:30 p.m. Which is the reason we are starting 30 minutes earlier, we have to be done by 8:30.

 All you need to remember is your adhesive and scissors. 
Class size is limited to the first 10 ladies to sign up!
 
Feel free to invite a friend, we always enjoy meeting new people and sharing what we love!!  But please remember, the techniques may be over whelming and we want everyone to have a good time. I don’t always the time for one on one teaching. 
Thank you for Understanding.
 
Cost of the class is $10 for the class, you will make 3 cards (2 Technique Cards and 1 Fancy Project), or the class is FREE if you order $20 (before shipping and handling) of Stampin' Up! Product from me.

Just send me an email if you can make it, I can't wait to show you three great cards.
 
Let's stamp something today!!
Cindy
 
******************************************************************************
Here is What is Happening:

SIGN UP TODAY!!


  June 12 - Technique Class, Apple Valley, Neillsville
  June 14 - Technique Class, Apple Valley, Neillsville
 June 27 - Kit Class, Schmittys, Neillsville

 
PRIVATE CLASSES ARE AVAILABLE - CONTACT ME TODAY!


  Cindys Stamping Studio On Line Store
(Just click on the above link to enjoy your Stampin" Up! Shopping!!  Thanks!!


******************************
  • Check out the Clearance Rack, just click on the link on the right hand side.
  • Check out the Paper Pumpkin monthly project kit - subscribe today - Paper Pumpkin Link


Tuesday, May 30, 2017

May Kit Cards - Spring is in the Air

Hello Everyone, I would like to share with you the lovely cards that we made at last week's Kit Class. We had a great time and I am always so impressed at how well these lovely ladies work together and separately making fifteen beautiful cards.  We always have room for one more so give it some thought, if you like making cards, Join Us!

Card #1 - For You
This lovely card is the type that you can send as a Birthday, Thinking of you or just plain Hello! The inside sentiment is, "You are a Fabulous Work of Art!"  We used the retiring Mint Macaron ink and card base.
Ingredients:
Stamp of Set:  Work of Art
Ink:  Black, Mint Macaron
Paper:  Mint Macaron Base, Smokey Slate Layer, Whisper White 3 3/4 x 5, Black
Accessories:  Dimensions, Butterfly Thinlets

Card #2 - Happy Birthday You!
This cute card uses the retiring Watermelon Wonder and retiring Festive Designer Series Paper.
Ingredients:
Stamp Set:  Big on Birthday
Ink:  Tempting Turquoise
Paper:  Delightful Dijon Base, Tempting Turquoise, Watermelon Wonder Layer, Festive Designer Paper, Whisper White
Accessories:  Dimensions, Balloon Punch, Twine

Card #3 - Congratulations
This card works just perfect for either a wedding or even an anniversary card, the Detailed Floral Thinlets just make the card.  The Floral Designer Series paper is retiring and is so beautiful.
Ingredients:
Stamp Set:  Floral Phrases
Ink:  Night of Navy
Paper:  Night of Navy Base, Whisper White Layer, Floral Designer Series Paper
Accessories:  Detailed Floral Thinlets, Night of Navy Stitched Ribbon

Card #4 - Happiness is Ice Cream!
The many stamps in the Cool Treats stamp set is so fun to work with, from ice cream cones to ice cream sundaes, oh what fun!
Ingredients:
Stamp Set:  Cool Treats
Ink:  Early Espresso, Chocolate Chip, Cucumber Crisp, Watermelon Wonder, Tip Top Taupe, Peekaboo Peach
Paper:  Watermelon Wonder Base, Tasty Treats Designer Series Paper, Pool Party Layer 3x3, Whisper White
Accessories:  Frozen Treats Thinlets, In Color Dollies, Dimensions, Cool Treat Washi Tape
Wink of Stella

Card #5 - Let's Celebrate You!
This is a great card to send to a friend for their birthday.  We used the retiring Oh So Succulent stamp set to stamp a great background on the "Celebrate" embossed layer.
Ingredients:
Stamp Set:  Oh So Succulent
Ink:  Black, Old Olive, Soft Sky, Flirty Flamingo, Wisteria Wonder, Blushing Bride
Paper:  Tip Top Taupe Base, Succulent Designer Series Paper Layer, Mint Macaron Layer 2 3/4 x 4, Whisper White
Accessories:  Dimensions, Celebrate Embossing Folder, Taffeta Ribbon, Mini Paper Clip

That is it for our Kit Cards, remember that the cards come in a "Kit", I offer five different card designs that you can copy or add to your own thoughts.  Everything is cut out for you, all you have to do is stamp and put the cards together.  You end up with fifteen cards to add to your stash.

If you have any questions, or would like to leave me a comment, I would appreciate it.  Also, if you are not yet subscribed to my blog, please look on the right hand side and enter your email address to subscribe.

Thanks so much for stopping by,
Cindy

*******************************************************************************
Here is What is Happening:

SIGN UP TODAY!!


  June 12 - Technique Class, Apple Valley, Neillsville
  June 14 - Technique Class, Apple Valley, Neillsville
 June 27 - Kit Class, Schmittys, Neillsville

 
PRIVATE CLASSES ARE AVAILABLE - CONTACT ME TODAY!


  Cindys Stamping Studio On Line Store
(Just click on the above link to enjoy your Stampin" Up! Shopping!!  Thanks!!


******************************
  • Check out the Clearance Rack, just click on the link on the right hand side.
  • Check out the Paper Pumpkin monthly project kit - subscribe today - Paper Pumpkin Link


Saturday, May 20, 2017

May 2016 Technique Class - Camouflage Direct to Paper

We had a fantastic turnout for this great technique, I found out about this technique from my upline, Kelly Acheson; brilliant!!  I am always looking for that technique that is easy, can be reproduced by my stamping ladies at home and is wow!!  Well this technique fit all of these I am happy to say.

What is Camouflage Direct to Paper you ask?  It is a matter of combining direct to paper and add a little bit of camouflage to it!  Every year I like to have a masculine class and this was just great!! BUT you could also add some pink ink and make it a card for the lady hunter that you know.

Taking Very Vanilla or Whisper White cardstock for your Direct to Paper technique and add two, three or more colors to create the camouflage results.  If you would like to watch Kelly's video, I have listed the link below.

Kelly's Stamp Above Direct to Paper Camouflage Technique

Card #1 - Card for You
Isn't this card stunning?!!  To make this camouflage background, select the following inks:  Crumb Cake, Soft Suede, Old Olive and Always Artichoke.  I took the lightest color (Crumb Cake) and swiped it across the bare Whisper White cardstock, it doesn't have to be solid ink or anything. Next crumple the cardstock and then open it up, swipe the next lightest color (Old Olive) and crumple it up again.  Continue this with all of the colors.  Take your bone folder and smooth the card stock out and finish your card.
Stamp Set:  The Wilderness Awaits
Ink:  Crumb Cake, Soft Suede, Old Olive, Always Artichoke and Early Espresso for the Sentiment
Paper:  Early Espresso Base & 3 1/2 x 4 Oval, Very Vanilla Layer & 3 x 4 Oval
Accessories:  Burlap Ribbon, Early Espresso Twine, Stapler and Dimensions

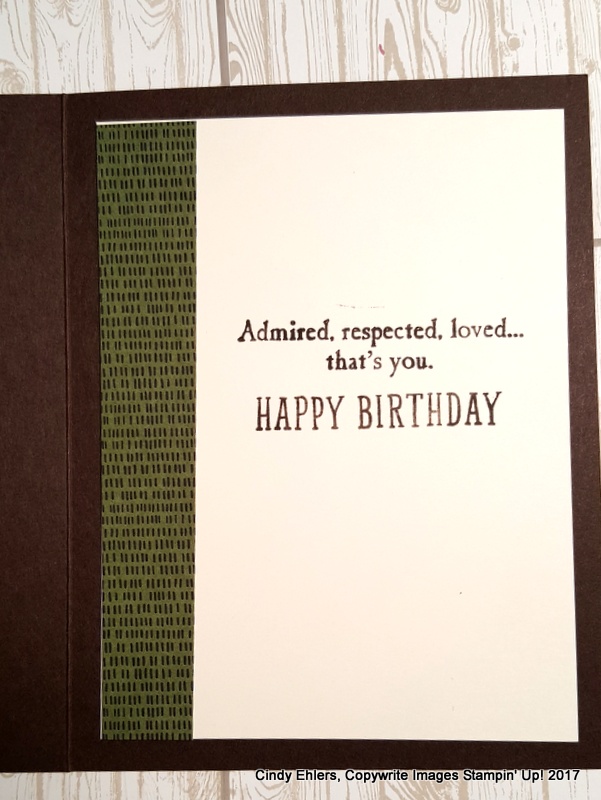
Here is a little tip for you, what does a person do with those little pieces of Designer Series Paper that you just don't have the heart to throw away but it really isn't big enough for much?  I have the perfect answer, decorate the inside of your card, like this:
I think that the little piece of Designer Series Paper adds so much to this card and a small strip of paper didn't go to waste!!

Card #2 - One Wild Ride
What do you think of this concept?!!  I love how it turned out!
Stamp Set:  One Wild Ride
Ink:  Black (Sentiment) Basic Grey and Smokey Slate for the Camoflage
Paper:  Basic Grey Base, Black Layer & 3 1/4 x 1 3/4 Layer, Whisper White 3 3/4 x 5
Accessories:  Badge Punch, Dimensions

And now for the Fancy Fold Card, I am not sure what kind of fold that this would be but it is such a lovely fold that you could easily reproduce it again and again!

Card #3 - In the Meadow
The card is your usual 5 1/2 x 8 1/2 piece of cardstock and is scored at 4 1/4 and 1 1/4; the 1 1/4 piece is turned up and that is the piece that you adhere the Cajun Craze Square that you have also adhered the Very Vanilla piece.
Stamp Set:  In the Meadow, Confetti Celebration
Ink:  Chocolate Chip, Old Olive
Paper:  Old Olive Base, Whisper White Square 2 3/4 x 2 3/4, Cajun Craze Square Layer 3x3, Botanical Designer Series Paper Layers 1 1/4 x 5 1/4 & 2 3/4 x 5 1/4

Here is what the card looks like open:
Isn't that just clever?  It just is a different what to make a lovely card. When the recipient receives the card and opens it, they can still look at the front image.  Love ir!!

That is our technique class for May, I hope that you enjoyed it.  If you have any questions, or would like to leave me a comment, I would appreciate it.  Also, if you are not yet subscribed to my blog, please look on the right hand side and enter your email address to subscribe.

Thanks so much for stopping by,
Cindy

*******************************************************************************
Here is What is Happening:

SIGN UP TODAY!!


  June 12 - Technique Class, Apple Valley, Neillsville
  June 14 - Technique Class, Apple Valley, Neillsville
 May 30 - Kit Class, Schmittys, Neillsville

 
PRIVATE CLASSES ARE AVAILABLE - CONTACT ME TODAY!


  Cindys Stamping Studio On Line Store
(Just click on the above link to enjoy your Stampin" Up! Shopping!!  Thanks!!


******************************
  • Check out the Clearance Rack, just click on the link on the right hand side.
  • Check out the Paper Pumpkin monthly project kit - subscribe today - Paper Pumpkin Link


Tuesday, May 9, 2017

April Stamp of the Month - Country Livin'

The winning stamp set for April was Country Livin', I just love this set; it isn't a big confusing set but if you are a little bit country or just country at heart, this is a set to add to your collection.  The April Stamp of the Month kit comes with the Stamp Set and Everything that You Need to Make 4 Cards.

Card #1 - Country Boots for Her
 What a fun and simple card, I love how this card came together.  I lightly stamped the flower bunch from the stamp set Birthday Blossoms on the Whisper White cardstock in Pool Party.  Stamping and coloring the boots in Soft Suede and Die cutting the flowers from Jar of Love, add some gold twine and white enamel dots and you have a great card for that country gal.

Card #2 - This Old Truck
 For this card I just wanted the old truck to be the highlight, I stamped the Hardwood Background stamp in Tip Top Taupe on Tip Top Taupe cardstock.  I am going to miss this color, I have used it so much in the last two years, but it is retiring on June 1st.  I then stamped the truck onto Very Vanilla cardstock in Chocolate Chip ink and sponged some ink around the edges.  Added this to a layer of Chocolate Chip cardstock and added a loose twine bow.  Great Masculine Card!

Card #3 - Fancy Fold Card with the Old Truck

 As you can see this old truck is great on it's own or it can be colored with markers or watercolor pencils which is what I used.  I added the sentiment and layer and the card was ready to go.  It doesn't take much to make a great card it is the little things!!

Card #4 - Sing Me a Song!
The last card featured the guitar that is in this stamp set, I paired it up with some designer series paper that I had, some twine and silver stars.  I also added some Gorgeous Grunge to the card to make it look less white in the background.  I really love how this card turned out.

Like our Stamp of the Month cards, I will be announcing the May Stamp of the Month set on Thursday.  If you already have the winning stamp set, you can order the card kit of four cards from me for $5; it comes with everything that you need to make the cards including detailed instructions and colored pictures.

Happy Stamping!
Cindy

Monday, May 1, 2017

April Kit Class

Last week some lovely ladies got together to make some lovely cards!  It was the Kit Class, everything is cut out and ready for the ladies, all they have to do is stamp, cut out the die shapes, and assemble.  This class isn't for everyone as it is fast paced, but I have made it easier by coming up with five designs that they make three times.  This seems to be working pretty good!  To make it an even better day, I had a visitor that turned into my helper!!

Here are the cards!!
Card #1 - Happy Mother's Day or Happy Birthday
That is what I love about so many of the cards that we make, they are versatile, those that would rather have a Birthday card can easily make this card just that!
Stamp Set:  Oh So Succulent (Retiring)
Ink:  Sweet Sugarplum, Black, Mint Macaron (Inside)
Paper:  Pool Party Base, Sweet Sugarplum Layer, Succulent Designer Series Paper (Retiring), Whisper White
Accessories:  Enamel Shapes, Dimensions, Sponge Daubers, Succulent Framelets, White Satin Ribbon

Card #2 - Falling Flowers Birthday Wishes
Stamp Sets:  Falling Flowers, Timeless Texture, Advant Garden
Ink:  Watermelon Wonder (Retiring), Flirty Flamingo, Pear Pizzazz, Tip Top Taupe (Retiring), Black
Paper:  Watermelon Wonder Base (Retiring), Flirty Flamingo Layer, Whisper White
Accessories:  Mayflower Framlits, Dimensions, Flirty Flamingo Ruched Ribbon, Decorative Label Punch

Card #3 - Happy Father's Day or Happy Birthday For You

Notice this great way to use those extra pieces of Designer Series Paper, use it to decorate the inside of your card!!

Stamp Sets:  Wilderness Awaits (Retiring), Hardwoods
Ink:  Early Espresso, Chocolate Chip
Paper:  Always Artichoke Base, Chocolate Chip Layer, Very Vanilla, Botanical Gardens Designer Series Paper (Retiring)
Accessories:  Dimensions

Card #4 - With Sympathy & Respect
This great card uses the technique "Ghosting", by stamping off our flower we are able to make it appear lighter and in the background.  We also used leftover Designer Series Paper to decorate the inside of our cards and used the Wink of Stella glitter pen to add a hint of sparkle to the flowers on the front.

Stamp Sets:  Garden in Bloom, Thoughts and Prayers
Ink:  Rich Razzelberry, Black, Smokey Slate, Blushing Bride
Paper:  Smokey Slate Base, Rich Razzelberry Layer, Whisper White
Accessories:  Stitched Circle Framelit, Layering Circle Framelit, Dimensions, Wink of Stella

Card #5 - It's Your Day!
This lovely card can be a Graduation Card or if you leave off the black graduation hat, it can also be a birthday card!  I love how this card turned out, simple but great!!
Stamp Sets:  Sunshine Sayings or Fabulous Four (Retired)
Ink:  Black, Cherry Cobbler
Paper:  Cherry Cobbler Base, Black Layer, Whisper White
Accessories:  Dimensions, Glimmer Paper, Twine for Tassel, Glue Dots, Cherry Cobbler Linen Ribbon

These were the cards that the ladies made, I hope that you enjoyed seeing them.  If you ever have need for stamping supplies, I hope that you will consider contacting me for your Stampin' Up! needs. 

Oh!!  I almost forgot to post a picture of my visitor & helper, complete in Paw Patrol Pajamas, isn't he the cutest?!!

 Thanks for stopping by!
Cindy

*******************************************************************************
Here is What is Happening:

SIGN UP TODAY!!


 May 8 - Technique Class, Apple Valley, Neillsville
 May 10 - Technique Class, Apple Valley, Neillsville
 May 30 - Kit Class, Schmittys, Neillsville

 
PRIVATE CLASSES ARE AVAILABLE - CONTACT ME TODAY!


  Cindys Stamping Studio On Line Store
(Just click on the above link to enjoy your Stampin" Up! Shopping!!  Thanks!!


******************************
  • Check out the Clearance Rack, just click on the link on the right hand side.
  • Check out the Paper Pumpkin monthly project kit - subscribe today - Paper Pumpkin Link

Thursday, April 27, 2017

Mother's Day is Coming Up

I have only been posting pictures of cards from my classes, but with Mother's Day coming up in a couple of weeks I wanted to share the cards that I have been working on.

I have been commissioned to make some cards that will be sold in the southern part of the state, so besides my classes, I have also been making cards for sale!  Talk about busy!!

The Mother's Day cards turned out so beautiful, that I just have to share:

My first card uses the Blooms and Bliss Designer Series Paper, Everyday Tags (which is retiring the end of this month), Falling Petals Embossing Folder (also retiring), Lace Doilies (also retiring) and White Satin Ribbon.
My second card uses the Circle of Spring stamp set (Retiring) that I embossed with white embossing folder and then uses sponge daubers to add the colors.  This is an Embossed Resist Technique. The ribbon is Mint Macaron (Retiring) along with the  Irresistibly Floral Designer Series Paper (Retiring) on a Mint Macaron Card Base.  Mint Macaron is one of the In Colors that will be retiring at the end of May.
 My third card uses the Falling in Love Designer Series Paper (Retiring) that I just love!!  Such a simple card that is a great way to use those small pieces of paper that you just can't throw away!
 My fourth card uses the Birthday Blooms stamp set that is a great stamp set to use the Emboss Resist Technique with.  The stamped image is embossed in white and the color is sponged on, the easiest way in the world to color those images!  This technique makes the card look so soft.
 My fifth card uses the stamp set Oh So Succulent and the matching Succulent Garden Designer Series Paper, I am so sad to see both of these retiring, it also came with the Happy Mother's Day greeting.
Tell me what you think of my Mother's Day cards, I am also happy to hear from you.  Thanks so much for stopping in and have a great day.
Cindy