Sunday, December 16, 2012

Thank You Card & Christmas Gift From My Ladies!

I wanted to share with you the love cards and gift that I received from some of the ladies that attend my stamping class.  It was truly appreciated and not at all expected. So thank so much from the bottom of my heart!

 The first card was made for me by Bernie Seidel, the detail of the flowers and leave are just beautiful in person!

 This Christmas card was made for me by Sandra Schumacher, the glitter and ornaments are just lovely, she did a wonderful job!  The envelope was also decorated and is just beautiful!
This ornament was made for me by Donna Jakobi, you may have noticed that this is the same ornament that is on the Holiday Mini Catalog for Stampin' Up!  I couldn't believe how pretty it is in person.

Also, thanks so much to Bev Linmila and Bernie Seidl for the lovely gift.

Thanks again Ladies, I appreciate the gifts and cards so much.

As always thanks for stopping in. Take care,

Cindy

Thursday, December 13, 2012

My Winning Card


Remember this Card from my September Technique Class, Direct to Paper?

I am happy to say it was the winning card for Impressionistic Stampers Card Contest.  I always try to submit the cards that we make each month and have been very lucky and have won this contest a number of times this year.  It doesn't matter how many times that I have won the contest, each and every time I just thrilled.  In my wildest dreams I never thought that I could compete with some of the talented demonstrators that also submit cards to this contest.  So allow me to toot my own horn, "Whoo-Hoo!!"  "How lucky I am!"

Thanks for stopping in, I have another post planned for this week and want to share the talent of some great ladies that I am fortunate enough to know and stamp with!!

As always take care!
Cindy


Wednesday, December 12, 2012

December Stamping Technique Class - Glamming Glitter

Love Glitter?!  Who Doesn't?!!

This technique is a hassle-free way to include the shiny stuff in your paper crafting projects - without the mess of traditional glitter!

  1. Take a piece of Stampin' Up! Silver Glitter Glimmer paper or light colored Glimmer paper.
  2. Use Sponge Daubers to apply your favorite Stampin' Up! Classic Stampin' Ink.
  3. By using your heat tool, the ink will dry faster and you can complete your project.
It's as Simple as That!!

Now let me show you the cards that we made..............

Christmas Believe
Card stock:  Pool Party 5 ½ x 4 ¼”, Whisper White 5 ¼ x 4 Silver Glimmer paper
Ink:  Tempting Turquoise, Pool Party
Accessories:  Silver Brad, Snow Flurry Bigz Die, Northern Flurry Textured Impressions Embossing Folder, 1.2” punch, daubers

Christmas Merry Ornament
Card stock:  Raspberry Ripple 4 ¼  x 5 ½, Silver Glimmer paper, Whisper White Cardstock for the Ornaments
Ink:  Raspberry Ripple & Gumball Green
Accessories:  Sponge Daubers, Silver Cord


And finally this was our Fancy Fold Card; 
Gift Card Holder
It looks like a present, but when you open the top, its a Gift Card Holder, how cool is that?!  I got this idea from my upline, Kelly Acheson. So Thank You Kelly for this great idea!!

 Ink: Gumball Green  Access: Lg Oval Punch; Scallop Oval Punch; Pokey Tool & Mat; 1-1/4” & 1” Circle Punches; Green Glimmer Brads; Liquid Glue  
Card stock: Cherry Cobbler 7-1/2 x 4-1/4 - scored at 3-3/4; Gumball Green 1/2 x 3-3/4; Be of Good Cheer DSP 3 x 4-1/4; Very Vanilla 3-1/4 x 3-3/4

Fold the 3 x 4-1/4 piece of DSP in half for the top.  
Fold the Cherry Cobber bottom in half on the score line.  
Attach the present top with a brad on the left side so it will lift up like shown in the photos above.

I thought the cards turned out so nice and they are really so EASY!!  I just love not having to wear glitter for the next week, this is just so much easier!

The January class will be January 14, 2013, at the Apple Valley Banquet Room here in Neillsville.  The January technique will be stamping with Acrylic Blocks to make a beautiful background.  I already have some ideas for this class, your going to just LOVE them!

My cards are available as kits or I would be happy to make them for you if you see something that you like. You can join my class if you live in my area or I would be happy to send them to you.  Contact me at budy98@yahoo.com for any details or questions that you might have.

As always, thanks for looking.
My wish to you, may you have a blessed Christmas and the happiest New Year!
Cindy

Tuesday, November 20, 2012

November Stamping Technique Class - Faux Patina

Create a Tarnished Look with Several Steps!

Apply ink to the flat side of your embossing folder, run through Big Shot. Then sponge the lightest to the darkest ink to the raised images. Dry, Sponge Versamark & apply embossing powder. An easy technique that will produce elegant results!

 Birthday Card:
Stamp Set:  SU Serene Sihouette
Ink:  Maurina Mist, Always Artichoke, Early Expresso, Crumb Cake
Cardstock:  Maurina Mist 5 1/2 x 8 1/2 Base, Early Expresso Layer 5 1/4 x 4, Early Expresso 2nd Layer 3 3/4 x 2 1/4, Whisper White 3 3/4 x 5 &  3 1/2 x 2
Accessories:  Gold Embossing Powder, Versamark, Sponging, Maurina Mist & Always Artichoke Markers, Vintage Wallpaper Embossing Folder

Wedding Card

Stamp Sets:  Always Elegant (Retired)

Ink:  Pumpkin Pie, Cherry Cobbler, Basic Grey, Midnight Muse
Cardstock:  Cherry Cobbler 5 ½ x 11
Midnight Muse 4 x 5 ¼
Whisper White 3 ½ x 1 ½ (3 of these)
Whisper White (inside 4 x 5)
Accessories:  Pewter Embossing Powder, Lacy Brocade Embossing Folder, Midnight Muse Satin Stitch Ribbon, Glue Dot under ribbon, Dimensions-2

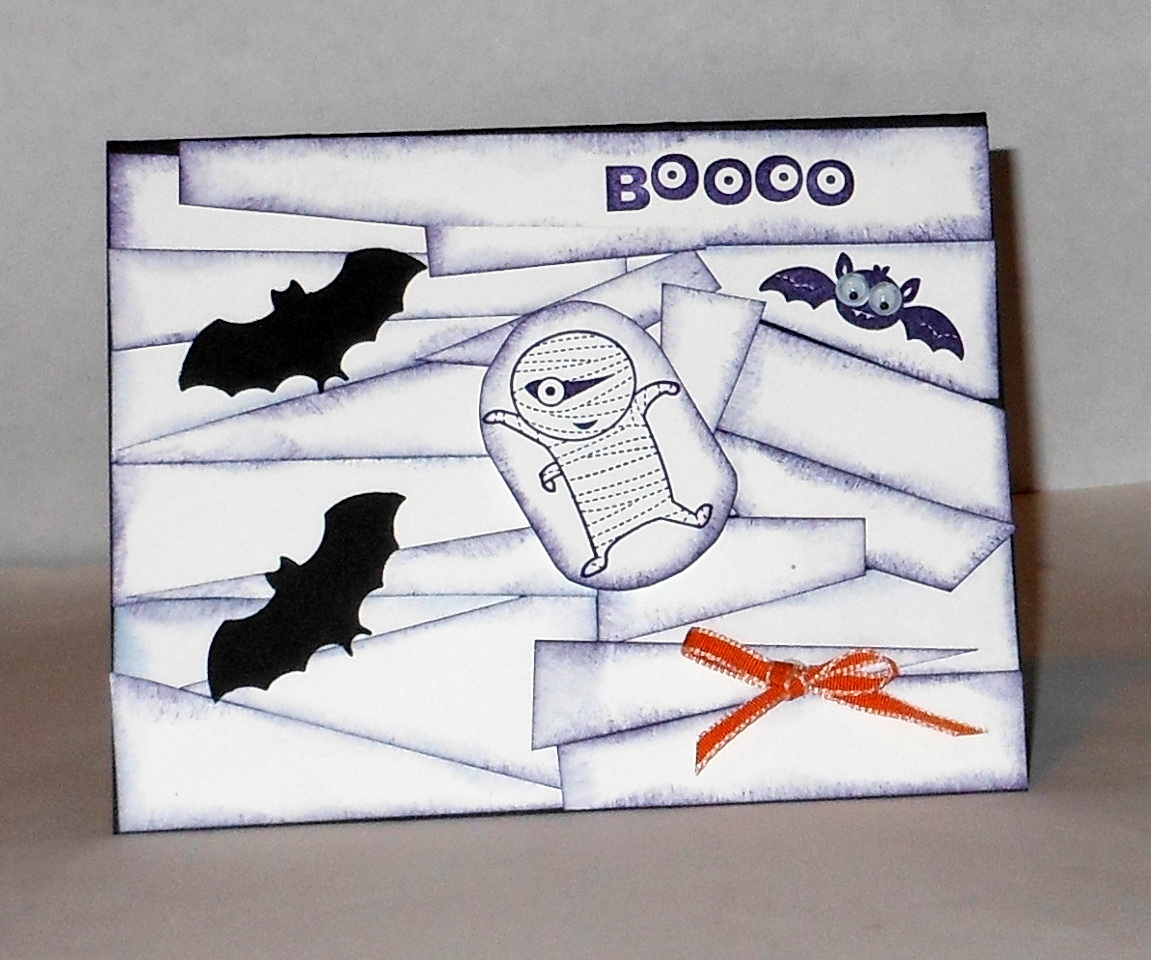
Fancy Fold Card - Trifold Card with a Flap!


 This was a fun and very easy card to make and will make a perfect Baby Card, the inside was punched to hold a gift card. I used little magnets to hold the card closed, it worked perfect!
Fancy Fold Card - Baby Card
Stamp Sets:  Fox & Friends, Bright Blossoms, One in a Million
Ink:  Soft Suede, Island Indigo, Lucky Limeade, Rich Razzleberry
Cardstock: Certainly Celery 3 ½ x 11 (Score at 4 ¼ & 8 ½)
DS Summer Smoochies Paper 3 ¼ x 4 (Cut 2)
Whisper White 3 ¼ x 4
Accessories:
Lightweight magnet, Adorning Accents Edgelits, 1 ¾ Circle Punch, Large Scallop Punch

Step 1: Take the 3 ½ x 11 c/s and trim one of the short ends, by making it rounded. I used the Adorning Accents Edgelits. 
Step 2:  Score CS at 4 ¼ & 8 ½ 
Step 3:  Fold at scores & adhere DS paper to lower flap.
Step 4: Decorate card as you wish.
Step 5: Adhere round piece, layer & fasten to card with 2 dimensions on the top half only.
Step 6: Adhere magnetic closures to the back of main image, and the inside base of the card. 

And because it was our anniversary class, we have been meeting monthly for the last year!  To celebrate, I made each of my ladies this cute little bulletin board.

The cork measured 6x6, Gumball Green Layer 7x7 and the Early Expresso Layer 7 1/4 x 7 1/4. For the Notes Layer on top I used Cherry Cobbler cardstock and Orchard Harvest Designer Series Paper. I used the Stampin' Up Twine and threaded that through the big button, fastened to the Dotted Gumball Green Grosgrain Ribbon with a glue dot; and to top it off I glued the buttons to the thumbtacks using Super Glue.  
They turned out pretty cute!

The December class will be Monday, December 10 at the Apple Valley Restaurant Banquet Room. The December Technique will be Glammering Glimmer and you are just going to LOVE the cards that I have thought up for this class!  

As always, take care and Happy Thanksgiving!
Cindy


Monday, October 22, 2012

Happy Halloween!!

Happy Halloween!!

I needed a fun Halloween card for a friend who just LOVES Halloween, and this is what I came up with!
I also got the idea for this card from my upline and friend, Kelly Acheson, thanks Kelly!!

Ingredients:

Stamp Set:  Googly Ghouls
Card stock:  Whisper White & Basic Black
Accessories:  Punched Bats, Pumpkin Pie Ribbon, Googly Eyes
(All Stampin' Up! Products)


Thanks for stopping, as always, take care!
Cindy

Wednesday, October 17, 2012

October Technique Stamping Class - Masking

Masking - October, 2012

Something as simple as a little Post-In note or Other similar “Mask” adds lots of depth to your stamping.
First Card - Happy Anniversary Card
Stamp Set:  Tweet Leaves (Holiday Mini Catalog)
A Word for You
Ink:  Summer Star fruit, Raspberry Ripple, Early Espresso, Soft Suede
Paper:  Daffodil Delite Base - 5 ½ x 8 ½
Early Espresso Layer - 5 ¼ x 4 ¼
Cherry Cobbler Layer - 5 x 3 ¾
Very Vanilla - 4 ¾ x 3 ½
Accessories:  Slides (Holiday Mini Catalog)
Raspberry Ripple Stitched Ribbon
Crumb Cake Seam Binding Ribbon
Maple Leaf Die
Sponging


 Second Card - Fall Deer Birthday

Stamp Sets:  Christmas Deer (Holiday Catalog)
Petite Pairs

Ink:  Chocolate Chip, Certainly Celery, Bashful Blue, Daffodil Delite, Calypso Coral, Tangerine Tango

Paper:  More Mustard Base - 5 ½ x 8 ½
Bravo Burgandy Layer 4 x 5
Old Olive 3 ¾ x 4 ½
Whisper White 3 ¼ x 4 ¼

Accessories:
Old Olive Dotted Grossgrain Ribbon
3 Pewter Brads


 Framelits Window Frame Die Cut Card
Fancy Fold - October, 2012

Make this fun-fold card by adjusting the clear acrylic plate on top of the scored card before it is die-cut with the Adorning Labels Die.

Base:  5 ½ x 8 ½ 

Score at:  4 ¼, then score one of those sides in half at 2 1/8”. Place the center point of the die on this 2 1/8” mark.

Place the cardstock on your Big Shot platform placing the clear acrylic plate over the area that you want to cut out. The acrylic plate edge meets up with the 2 1/8” score mark and just this part of is over the card stock and die. The rest is hanging over nothing as it runs through your Big Shot.

Cut 2 of the die-cut two images so that no matter if the card is open or closed, you see the image.

The inside die-cut is just a bit larger than the front one so that it layers wonderfully.

Helpful Hints:
**Cut Cajun Craze Piece so that one corner is cut off, to make the inside layer lay nicely.

**Inside:  Stamp off once for Crumb Cake circle stamp accent.

Ingredients:  
Stamp Sets:  Serene Silhouettes, Once in a Million
Ink:  Cajun Craze, Always Artichoke, Crumb Cake
Paper:  Very Vanilla 5 ½ x 8 ½ (Base)
Cut 3 - 4 x 5 ¼ (Window Frame Die)
Cajun Craze 4 x 5 ¼ (Window Frame Die)
Orchard Harvest Designer Paper 4 x 5 1/4

Accessories:  Framelits Window Frame Die Cuts


This is the Inside of the Card

Hope you enjoyed the cards that we made for our October Technique Class, if you would like to join us, we always have room for a couple more.  Don't live in the area, the cards are available for purchase either already made or as a kit.

As always, take care!
Cindy

Thursday, September 20, 2012

September Stamping Technique - Direct to Paper

It just is so hard to believe that this Saturday is the first day of fall!  Where did the summer go, and oh my gosh its fall, my most favorite time of the year and I have so much to do outside!!

We had our September Stamping Technique class on the 10th of September and this month's technique was Direct to Paper.

So lets see what my talented ladies created this month:


Direct to Paper Technique

Add ink directly onto your cardstock with your ink pad to create another great background!


First Card - Fall Sympathy

Stamp Sets:  Wonderfall & Petite pairs
By using the Bigger Clear Block, I arranged all of the my stamps for this background right on the block.

Ink:  Soft Suede, Cherry Cobler, Lucky Limeade, Chocolate Chip, Daffodil Delight, Cajun Craze

Cardstock:  So Saffron Base 5 ½ x 11
Old Olive Layer 5 ¼ x 4
Chocolate Chip 4 x 4 ½
Cherry Cobbler 5 x 2 ¼
Whisper White Inside 4 4 ½

Accessories:  Framelits, Crumb Cake Taffeta Ribbon, Linen Thread, Leaf Die, Dimensions, Chevron Embossing Folder, Argyle Embossing Folder, Woodgrain Embossing Folder, Tags Die, 1 ¼ & 1 3/8 circle punch, Postage Punch

-Cut Leaves first then stamp.  Ink up stamp then place cardstock over the top and rub with scratch paper.


I just love the color combination of this card, its such a great combination!!

Second Card - Fall Happy Birthday

Stamp Sets:  French Foilage

Ink:  Lucky Limeade, Early Expresso, Daffodil Delight, Pumpkin Pie, Not Quite Navy

Cardstock:  Crumb Cake Base 5 ½ x 11
Whisper White 2 ¼ x 3 ¼ & 4 x 5 ¼
Cajun Craze 2 ½ x 3 ½
DS Paper 1 ¾ x 3
Whisper White Inside 4 x 5 ½

Accessories:  Linen Thread, Wooden Button, Lacy Brocade Embossing Folder, Glue Dots


Our fancy fold card was:

Side Step Card

And I didn't even get a picture of it!  Here are the directions, we used the Stampin' Up! Googly Ghouls kit for the decorations of this card.

Base:  5 ½ x 8 ½
Score at:  4 ¼

Cutting:  Line up the short side of the c/s at the 3” mark on the paper cutter.  Start at 1” and cut all the way to 6 ½”.

Score: Lining up on the narrow end, Score at 1”, 2”, 3” and 6 ½”


Stamp Set:  Googly Ghouls

Cardstock:  Pumpkin Pie 5 ½ x 8 ½
Old Olive 1 ¾ x 1 /34
Black 2 x 2

Ink:  Basic Black

Accessories:  Googly Eyes, Bat Punch (Retired), Black Ribbon, Silver Mini Brads

Uses the Halloween Combination Set.


Sunday, August 19, 2012

August Technique Stamping Class - Faux Leather

Or Stamping with Masking Tape!! 

We had another great class this past Monday night, my ladies that come to my Technique Class were treated to another technique, and I must say that they are a great bunch of ladies to try these techniques!!  This month it was stamping with masking tape or Faux Leather.

Create a vintage look by tearing off small pieces of masking tape and covering your whole piece of cardstock with the tape.  Overlap your tape pieces and make sure your entire piece of cardstock is covered.  No need to tuck the pieces under the cardstock, it will get too bulky; we’ll just trim the excess off.

Card #1 is a Get Well Card using the new Stampin’ Up! Stamp set “Summer Silhouettes”; Summer Starfruit, Elegant Eggplant, Baha Breeze & Very Vanilla are the colors that we will be using. 

I suggest that when using the new Stampin’ Up stamp pads, stamp lightly, no need to tap, tap, tap the stamps; they will now ink up with just one tap.
You can fold the tape over, but I found that just trimming it off makes the card less bulky and lumpy.
Sponge color to your masking tape covered cardstock. Using the color combinations, you can make it as dark as you want it by just “pouncing” the color on and really working it in with the sponge.
The technique card says that you should cover your cardstock with Versamark ink then emboss, just as you normally do.  BUT I found out on Splitcoast Website that you don’t have to use the Versamark, the texture of the masking tape will cause the embossing powder to adhere to the tape.Create a vintage look by tearing off small pieces of m
asking tape and covering your whole piece of cardstock with the tape.  Overlap your tape pieces and make sure your entire piece of cardstock is covered.  No need to tuck the pieces under the cardstock, it will get too bulky; we’ll just trim the excess off.


Card #2 is a Birthday Card using my famorite, Lovely as a Tree stamp set.
The colors are Maurina Mist, Very Vanilla, Raspberry Ripple & Midnight Muse


Fancy Fold Card:  Double Dutch Fold
-Score your 4 3/16 x 9 piece of cardstock at 5 ½, set aside.
-Score the 2 x 8 ½ piece of cardstock at 2 1/8 and at 6 3/8, like a gate fold card. We are using the Designer Series Paper for this part of the card.
Fancy Fold Card:  Double Dutch Fold
Supplies:  One 4 3/16” x 9” piece of cardstock for card base.
-One 2” x 8 ½” piece of cardstock for dutch fold bottom.
-One 4” x 3 ¼” piece of cardstock or patterned paper for your layer.
-Score your 4 3/16 x 9 piece of cardstock at 5 ½, set aside.
-Score the 2 x 8 ½ piece of cardstock at 2 1/8 and at 6 3/8, like a gate fold card. We are using the Designer Series Paper for this part of the card.
Fold the outer panels of your 2 x 8 ½ piece of cardstock in and decorate as desired.
Adhere the center panel at the bottom of the back of the 4 3/16 x 9” piece of cardstock piece.
At this point it should have double folds along the left and right side.
The bottom of the top fold should line up with the double doors at approx. 3 ½ from the bottom.

Colors that we are using:  Tango Tangerine, Lucky Limeade, Tempting Turquoise & Whisper White. The folds are Summer Smoochie Designer Series Paper.

And that takes care of August's Monthly Technique class, join us next month for a popular technique:  Direct to Paper.

If you live too far away but would be interested in purchasing the cards in a kit, send me an email.  The kit would include all of the cardstock, accessories and complete instructions to make these lovely cards!

As always, thanks for stopping in and take care!
Cindy


Wednesday, July 11, 2012

I Am a Winner....Again!!

Every month there are two Card Contests that I enter, one of them being the Impressionistic Stampers LLC, I have been lucky enough to win this contest a couple of times.  Each and every time its always such a pleasant surprise, catches me totally off-guard and just "makes my day!"


News from the Impressionistic Stampers LLC

July 2012

June Contest Winner
Congratulations to Cindy Ehlers on her winning entry! 

Wednesday, July 4, 2012

July's Technique - Polished Stone

July Stamping Technique

Polished Stone

We created a unique background called Polished Stone, once again you can also re-create this look by looking around your house!  Rubbing Alcohol and Cotton Balls and your Stampin' Up! ink pad re-inkers.

Our first card was a sympathy card,

Stamps: Love & Sympathy

Ink: Midnight Muse, Primrose Petals; Bashful Blue Re-Inker, Pretty in Pink Re-Inker

Cardstock: Primrose Petals, Midnight Muse, Bashful Blue, Glossy Cardstock

Accessories: 1-Dimension, Midnight Muse Satin Stitched Ribbon, Sponging, Tulip Embossing Folder

Dimensions:
Primrose Petals 5 1/2 x 8 1/2
Midnight Muse 3 1/8 x 4 1/4
Bashful Blue 4 x 5
Glossy Cardstock 2 7/8 x 4


This is the second card, a summer Wedding card!
 

Stamps: Reason to Smile, One in a Million

Ink: Soft Suede

Cardstock: Summer Starfruit, Soft Suede, Glossy Cardstock, Cajun Craze, Comfort Cafe DS Paper

Accessories: 1-Dimension, Jewel Brad, Pearl Jewel, Chevron Embossing Folder, Daffodile Delight Seam Binding Ribbon

Dimensions:
Soft Suede 2 1/2 x 5 1/2
Glossy Cardstock 3 1/4 x 3 1/2
Summer Starfruit 4 1/4 x 11
Comfort Cafe DS paper 3 5/8 x 5 1/2

I just love how this card turned out, the flowers remind me of sunflowers!

 And this is our fancy fold card, its a box top card as it folds in just like when you fold a box!  Above is the outside and below is the card unfolded.


Stamps: Party This Way

Ink: Pool Party, Chocolate Chip, Island Indigo

Cardstock: Pool Party, Comfort Cafe DS Paper, Very Vanilla

Accessories: Pool Party Twine for the Inside, Penant Punch

Dimensions:
Very Vanilla 8x8"
Comfort Cafe DS paper 4 pieces measuring 1 7/8 x 4
Pool Party 4 1/4 x 4 1/2


(This is a original design that I came up with, the fold I got from my friend Janet Forton)

And that takes care of our class for July, 2012!  I always am amazed how much I am enjoying the techniques and folds, it really takes me out of my "comfort zone" but I love it!!

As always take care, stay cool (we are having hot and humid this week)
Cindy


Thursday, June 21, 2012

Garden Update!

This spring I decided that just because I can't mow around some of our big oak trees does not mean that they have to look terrible.  
 So I started building a new flower bed around the trees, using only recycled products for the actual flower bed itself.  The bricks I got from my son when he tore down his chimney.  Most of the plants I got at garage sale or from friends.  The bear statute I have had forever, he just looked pretty cool standing guard over everything!
 My welcome sign is a barbed wire wreath that my husband made for me, the barbed wire is from my Grandpa Becker.  When he was done using it he threw it on the "rock pile"  I got it back 20 years later!  And of course, I got the big rock from the rock pile also.
 My petunias are in a old dutch oven that I salvaged from somewhere and the "Welcome" is from a old sign that we had for years!  I wanted a two tier garden as this is a wet area.  Do not notice how crocked my bricks are, it is what it is!  I still like it!
I can't wait to see what it looks like next year once everything has taken off.  I plan to finish the backside of it next spring with more flowers.  Now on for more flower identification.

 Jacobs Ladder
 Missouri or Evening Primrose
 I am leaning towards Evening Primrose as this was taken at 8:30 last night and notice how the flowers have closed up for the evening.
 Blue Lobelia
 Diphenium

Star Gazer Lilly

Well thats all I got for now, I will try to keep up on my picture taking.  As always thanks for stopping,
Cindy

Monday, June 18, 2012

Our Next Class is coming up July 3, 2012
July Stamping Technique ClassPolished Stone

You are going to LOVE this technique! 

With some re-inkers and rubbing alcohol, we will be creating some great looking cards that you will love giving!


Date:  Monday, July 2, 2012 at 6:30 p.m.
(Due to a schedule conflict we are having class a week earlier than usual)

Memorial Medical Center - Manz Conference RoomHope you can make the class, if you have a friend that is a stamper or might be interested in stamping, feel free to invite them to join us.  We have a great group, its an informal class;
with lots of laughs and is sure to be a good time!

Congratulations to our Door Prize Winner:
Jane Braun

RSVP is easy, just reply back with this email!  Its that simple!  Hope to see you there!!!!

 
Cindy Ehlers
"Have you stamped today?!"
 
A Friend is someone who reaches for your hand but touches your heart!

Saturday, June 16, 2012

June Stamping Technique Class
Stamping with Bleach

This past Monday, June 11 was our monthly Stamping Technique Class.  Our technique for June was stamping with bleach.  I bet you are thinking, what will she think of next?!  Well read on for details about a technique that has been around for awhile but is one that is definitely one to try on your next stamping project!  

When you stamp with bleach you discover that different backgrounds and colors can be created with household bleach.  Using a light touch, stamp your background with any solid type stamp, let dry for approximately 3 minutes or so.  Note:  Color fast bleach does not work

Here is our first card, the colors that we used are Stampin' Up! Melon Mambo, So Saffron, Daffodil Delight and Gumball Green.
We used Melon Mambo Grosgrain Ribbon, two sizes of the Frame-its Dies and the stamp set, Forever with You.  Notice the cool background that we created with bleach!!

Our second card used the following colors:  Rich Razzelberry, Midnight Muse and More Mustard.
The stamp set that we used was Stampin' Up! Bright Blossoms, along with the Doily Die, a Glimmer Brad and we created a fabulous card.  

Now for the Fancy Fold Card:  Double Fold Gate Card
I just love this card, its so unique and so easy.  

All you need to do is cut a piece of card stock 5 1/2 x 12", Score at 2,4,8 & 10.  Turn and mark each end at 2 3/4", just a little mark on each end.  On your cutter, match up the 2 3/4" mark and the 2nd fold mark and cut the corner off of each end.  Save the corners to adhere to the front of the card.  

Fold each of your score lines, starting with the inside lines first and work your way in.  

This card can open from the left or right.  Running your center piece (butterfly) through the Vintage Wallpaper embossing folder adds a little more to your card.  Put 3 dimensions on one side of the butterfly to hold it to your card.

Here it is!!


Some of the ladies made the blue card above or the coral card below.  Stunning don't you think?!

And that takes care of June!  Our next class is going to come up real fast, due to schedule conflicts our next class will be July 2, 2012.  I will post the post very soon.

Thanks for looking, as always take care.
Cindy

Thursday, May 24, 2012

May Stamping Technique - Faux Tile

May 14 was our monthly Stamping Technique Class where we learnt the technique Faux Tile.  To create this unique background, you can use your scoring blade on your cutting machine or a ruler.  I decided to use the Stampin' Up! Simply Scored and added the Diagonal plate for the diagonal score lines.  I have to admit that the Simply Scored and Diagonal plate took a technique that could have been very difficult because of all of the measuring and turned it into a fun and fast technique.  All of the ladies loved how it took a nice card and made it into a GREAT card!!
This was the first card, we used our Stampin' Up! Simply Scored with the Diagonal Plate and scored every one inch horizontally then turned it vertical and scored it every one inch.  The cardstock that we used is the Retiring Stampin' Up! Pear Pizazz, Peach Parfait and Concord Crush.  The stampset was a "sneak peak" from the new Stampin' Up! catolog that will be coming out on June 1st, its called Bright Blossoms


 The second card, we created an accent piece in Stampin' Up! Old Olive and scored every one inch diagonally.  The cardstock was Stampin' Up! retiring Blushing Bride, Old Olive and Rich Razzelberry.  We used SU markers in Rich Raspberry and Old Olive for the flower, it really gave it a water color design.  The stamp set is Just Believe and I am so happy that it is NOT retiring!
 And finally our fancy fold card was this super cute graduation card.  I had pre-scored it for the ladies and used the directions that I found on "Scrap and Stamp with Mary" who is Mary Rindal from Greenwood Village, CO.  She provided a so very helpful tutorial that made making this card a breeze.  Good thing also as we received six graduation announcements in the mail!!  Needless to say I am pretty good at making graduation cards, if I do say so myself.   The finishing touch for this card is the tassle, which we made from embrodery floss.
This is the inside of the card, the hat is attached and its just a matter of scoring to create, you then just lift the hat up to see the inside of this great graduation card.

And that is it!!  I am already getting ideas for the June class, we will be stamping with bleach and I am sure it will be another fun class!!  If you are interested in attending class, there is always room or if you would like to just purchase the cards, let me know by email.

Take care, Enjoy the holiday weekend, hopefully it will be nice weather wherever you are.  We had some big thunderstorms move through this afternoon, alot of wind gusts and rain but lucily no real damage. We did loose two pine trees that just blew right over by the roots.

Cindy

Thursday, May 10, 2012

My Flower Gardens

Besides stamping I also like flowers, especially flowers that I can grow myself. I don't usually pick the flowers, I just like to admire them.  I am always so happy in the spring when I see what flowers "made it" from the past winter.

I am also finding that I can't remember all of their names, so I thought I would post some pictures and what I think they are, if I am wrong, feel free to let me know their correct name.  I am also hoping that this will help me remember next year just what some of these are as sometimes I loose the plant stakes that has their names on them!
 This grows wild all over our place, since I love the flowers and how colorful they are I dug some up and put on the northside of the house, they are Wild Geraniums.
 Same with the Trilliums, I think they are just lovely.
 I just found out that this is a Fern Leaf Peony. When my Grandma Mashin passed away, my mom gave me the go-ahead to dig up some of her flowers.  This is peony bush is usually the first to bloom in the spring and the blooms are rather small, I can't believe how big this bush has gotten in a short amount of time.
 This has been bugging me but I think I figured out what it is, its a Virginia Bluebell. Someone tried to tell me that its a Bachelors Button but the flowers are not button shapped but rather like little bells. The internet was my source of info, so if I am wrong, feel free to correct me.
I didn't think that my Jack-in-the-Pulpit made it this year, but they are coming up and I am so happy!!  The lacy leafed plant next to them are Dutchmen's Britches.  I didn't think to take their picture this year so I will have to wait for next year. I started out with just a small plant and they are multipling nicely also.
This is my white Bleeding Heart, its almost done and it had a rough start as it was all leafed out and then it froze, I had covered them but I missed one night. I also have a pink one but its an older plant and is done for the season.

Well there you have it!  I know that I have published pictures of my Grandma's pretty yellow flowers or what they are really called, Missouri Primrose.  I also have been busy transplanting them as they multiple like crazy, so I had a plan, because we are in the woods and are lawn has alot of old trees, I am planting yellow flowers wherever I can't get up to with the lawnmower, those big roots of the trees are really nasty to the lawnmower blades anyway. This way I don't have to worry about hitting the roots and I have pretty yellow flowers to look at!  Works for me!!

As always, thanks for stopping in.
Take care,
Cindy